Posted on Leave a comment

How to Replace Your Laptop Keyboard:

A Complete DIY Guide (With Video Tutorials)

Is your laptop keyboard acting up? Maybe keys are sticking, some aren’t responding, or you spilled your morning coffee across the letter keys. Don’t worry—replacing a laptop keyboard is often easier than you might think. While it varies by model, many laptops allow for keyboard replacement without a full teardown.

In this guide, I’ll walk you through the general process, important considerations, and share specific video tutorials to help you tackle the job confidently.

🛠️ Before You Begin: Is Keyboard Replacement Right For You?

Consider These Factors First:

  1. Warranty Status – If your laptop is under warranty, contact the manufacturer first.
  2. Cost of Replacement – Sometimes, especially with budget laptops, replacement costs approach the device’s value.
  3. Alternative Solutions – Try these first:
  • Use compressed air to clean under keys
  • Update keyboard drivers
  • Test with an external USB keyboard
  • Check for specific software issues

Do You Need Professional Help?

Consider taking it to a repair shop if:

  • Your laptop is ultra-thin or has a “chiclet” keyboard fused to the top case
  • You’re uncomfortable working with small connectors
  • The keyboard is riveted or glued in place
  • You don’t have the proper tools

⚠️ Essential Safety & Preparation

Tools You’ll Need:

  • Small Phillips screwdriver (#00 or #0)
  • Plastic spudger or guitar pick
  • Tweezers (for small connectors)
  • Container for screws (muffin tins work great)
  • Anti-static wrist strap (optional but recommended)

Safety First:

  1. Power Down Completely – Shut down your laptop, don’t just put it to sleep
  2. Disconnect Everything – Unplug the charger and all peripherals
  3. Remove the Battery – If removable, take it out. If not, disconnect the internal battery if possible
  4. Ground Yourself – Touch a metal surface to discharge static electricity
  5. Work in a Clean, Organized Space – Use a table with good lighting

🔧 General Step-by-Step Replacement Process

Note: This is a general guide. Your specific model may differ significantly.

Step 1: Identify Your Keyboard Type

  • Removable Keyboard – Usually held by screws or clips from the bottom
  • Top-Case Assembly – Keyboard is part of the palm rest assembly
  • Backlit Keyboard – Has additional LED connectors

Step 2: Access the Keyboard

Method A: Top-Down Removal (Most Common)

  1. Remove all screws from the bottom of the laptop
  2. Carefully pry up the keyboard bezel (the plastic frame around the keyboard)
  3. You’ll see screws or clips holding the keyboard in place

Method B: Bottom-Up Removal

  1. Remove bottom panel
  2. Look for keyboard mounting screws from underneath
  3. Some models require removing the entire top assembly

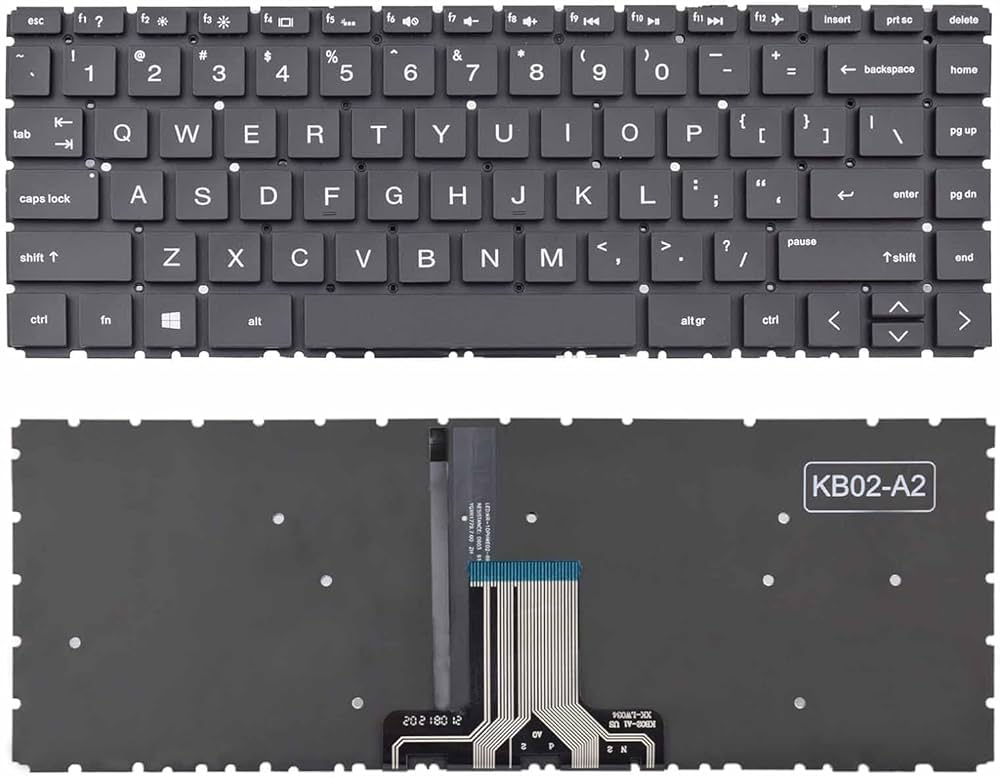
Step 3: Disconnect the Ribbon Cable

THIS IS THE MOST CRITICAL STEP

  1. Locate the thin ribbon cable connecting the keyboard to the motherboard
  2. Gently flip up the locking mechanism – usually a small black or brown latch
  • Some slide sideways
  • Some flip upward
  • Never pull straight out without releasing the lock first!
  1. Once unlocked, the cable should slide out easily

Step 4: Remove the Old Keyboard

  1. Remove any remaining screws (they’re often tiny)
  2. If clipped in, gently work around the edges with a spudger
  3. Lift the keyboard out carefully

Step 5: Install the New Keyboard

  1. Position the new keyboard in place
  2. Connect the ribbon cable before securing the keyboard
  3. Lock the ribbon cable connector – you should feel/hear a click
  4. Secure with screws or clips
  5. Replace any bezels or panels you removed

Step 6: Reassemble and Test

  1. Reinstall any other components you removed
  2. Reconnect the battery
  3. Power on without replacing all screws first
  4. Test every key thoroughly
  • Use an online keyboard tester
  • Check special function keys (Fn, volume, brightness)
  • Test backlighting if applicable

📹 Model-Specific Video Tutorials

Always search for your exact laptop model, but here are some common examples:

1. HP Pavilion / General HP Laptop Keyboard Replacement

This video shows the common “top-down” approach used in many HP models:
HOW TO Replace HP Pavilion 15 Keyboard – YouTube

2. Dell Inspiron 15 (5000/7000 Series)

Excellent tutorial showing both screw and clip removal methods:
Dell Inspiron 15 5570 Keyboard Replacement – YouTube

3. Lenovo ThinkPad Keyboard Replacement

ThinkPads often have particularly serviceable keyboards:
Lenovo ThinkPad T480 Keyboard Replacement Guide – YouTube

4. MacBook Pro Keyboard Replacement (Butterfly Mechanism)

Warning: This is complex! MacBooks often require top case replacement:
MacBook Pro Keyboard Replacement – Complex Disassembly – YouTube

5. ASUS / Acer General Guide

Good overview of the bottom-access method common in many Asian-brand laptops:
ASUS Laptop Keyboard Replacement Step by Step – YouTube


💡 Pro Tips for Success

Finding the Right Replacement Part:

  1. Use Your Service Tag/Serial Number – Check the manufacturer’s parts lookup
  2. Match Part Numbers Exactly – Even similar-looking keyboards might have different connectors
  3. Consider OEM vs. Third-Party – OEM ensures compatibility; third-party can save money
  4. Check Connector Type – Take photos of your old keyboard’s connector before ordering

During Installation:

  • Take Photos at each step for reference during reassembly
  • Keep Screws Organized – They’re often different lengths
  • Go Slow with Ribbon Cables – They tear easily
  • Don’t Force Anything – If it’s not coming loose, you probably missed a screw

Common Mistakes to Avoid:

  • Forgetting to disconnect the battery
  • Pulling ribbon cables without unlocking them first
  • Using metal tools to pry plastic clips (they break easily)
  • Overtightening screws (can crack plastic or strip threads)

🔍 Troubleshooting Post-Installation

If Some Keys Don’t Work:

  1. Re-seat the ribbon cable connection
  2. Check for bent pins in the connector
  3. Ensure the keyboard is fully seated

If Keyboard is Completely Dead:

  1. Verify battery is connected
  2. Check for damaged ribbon cable
  3. Look for disconnected flex cable elsewhere on motherboard

If Keys Feel Mushy or Stiff:

  1. Ensure no debris under the keyboard
  2. Check that all clips are properly engaged
  3. Make sure no screws are overtightened

📞 When to Call a Professional

Consider professional repair if:

  • Multiple keys are dead but the keyboard tests fine (could be motherboard issue)
  • You encounter stripped or damaged screws
  • The keyboard is soldered to the motherboard (rare but happens)
  • You’re simply not comfortable continuing

Many local repair shops offer free diagnostics and can give you a quote before proceeding.


💰 Cost Considerations

  • Replacement Keyboard: $20-$80 depending on brand and model
  • Professional Installation: $50-$150 labor
  • DIY Savings: Typically $50-$100 vs. professional repair
  • Time Investment: 30 minutes to 2 hours for most models

Final Thoughts

Replacing a laptop keyboard can seem intimidating, but with patience, the right tools, and a good guide, many people successfully complete this repair on their first try. The satisfaction of fixing it yourself—plus the money saved—makes the effort worthwhile.

Have you replaced a laptop keyboard before? Share your experience, tips, or questions in the comments below!

Next up in our repair series: How to clean and repaste your laptop’s cooling system for better performance.


Disclaimer: Laptop repair carries risks including potential damage to your device and voiding of warranties. This guide is for informational purposes only. Always consult your device’s service manual and proceed at your own risk. When in doubt, seek professional assistance.

Posted on Leave a comment

Is Your Laptop Charger Failing?

7 Signs It’s Time for a Replacement

Your laptop charger is the unsung hero of your daily workflow—until it stops working. Suddenly, that reliable power source becomes a source of frustration, unreliable performance, or even safety concerns. But how do you know when to replace it before it fails completely?

In this guide, I’ll walk you through the telltale signs your charger needs replacing, plus tips for choosing the right replacement.

⚠️ The Obvious Red Flags: When Replacement is Non-Negotiable

1. Physical Damage is Visible

  • Frayed or exposed wires near the adapter or connector
  • Bent or loose charging pins that won’t stay connected
  • Cracks in the adapter casing or melted/discolored plastic
  • Burn marks or unusual smells when plugged in

Safety First: If you see any of these signs, stop using the charger immediately. Damaged chargers can pose fire hazards or damage your laptop’s internal components.

2. Intermittent Charging or Connection Issues

  • The charging indicator flickers on and off
  • You have to position the cable “just right” to get contact
  • Charging stops if the cable moves slightly

This often indicates worn internal wiring or connector damage that will only worsen.

3. Your Laptop Isn’t Charging at All

Before panicking:

  • Test the wall outlet with another device
  • Try a different power cable if your charger has a removable cord
  • Check for debris in your laptop’s charging port

If other chargers work with your laptop but yours doesn’t, the charger has failed.

🔍 The Subtle Warning Signs: Early Detection Saves Money

4. Slower-Than-Usual Charging

If your laptop used to charge fully in 2 hours but now takes 4+, your charger may be delivering insufficient power. This can also cause your laptop to lose charge while plugged in during heavy use.

5. The Adapter Gets Unusually Hot

While some warmth is normal, excessive heat (too hot to touch comfortably) indicates inefficiency or impending failure. Modern chargers should remain relatively cool during operation.

6. Buzzing, Humming, or Crackling Sounds

Any audible electrical noise from your charger is abnormal. These sounds can indicate transformer issues, capacitor problems, or loose components.

7. You’re Using an Incompatible Charger

Using a charger with:

  • Wrong voltage (can cause immediate damage)
  • Insufficient amperage (causes slow charging or battery drain during use)
  • Wrong connector size (even if it fits loosely, it can damage the port)

🔧 Quick Diagnostic Checklist

Before buying a new charger:

  • ✅ Test with a known-good charger if possible
  • ✅ Inspect your laptop’s charging port for damage or debris
  • ✅ Check if the issue follows the charger or the laptop
  • ✅ Verify your charger’s specifications match your laptop’s requirements

🛒 Choosing the Right Replacement Charger

Match Specifications Exactly

Look for:

  • Voltage (V): Must match exactly (e.g., 19.5V)
  • Amperage (A): Can be equal or higher than original
  • Wattage (W): Voltage × Amperage (higher is usually safe if voltage matches)
  • Connector size and polarity: Must be identical

Quality Matters: OEM vs. Third-Party

  • OEM Chargers: Made by your laptop manufacturer. Guaranteed compatibility but often more expensive.
  • Reputable Third-Party Brands: Look for UL certification, good reviews, and warranty coverage.
  • Avoid No-Name Brands: Cheap chargers often lack proper safety features and can damage your laptop.

Consider Upgrading

  • USB-C PD Chargers: If your laptop supports USB-C charging, consider a versatile GaN charger that can power multiple devices
  • Higher Wattage Options: If available for your model, can support faster charging
  • Longer Cables: Quality extension cables can improve flexibility without sacrificing power delivery

🔌 Pro Tips for Charger Longevity

  1. Don’t Wrap Cables Tightly – Loosen coils to prevent internal wire damage
  2. Pull from the Plug, Not the Cable – Prevents connector strain
  3. Keep Away from Heat Sources – Prolongs capacitor and component life
  4. Use a Surge Protector – Protects against voltage spikes
  5. Store Properly – Avoid bending or crushing in bags

📹 Helpful Video Resources

  1. How to Identify Laptop Charger Specifications
  1. Testing Your Charger with a Multimeter
  1. Universal Charger Safety & Compatibility Guide

🚨 When to Seek Professional Help

Consult a technician if:

  • Your laptop has multiple charger failures (could indicate internal issues)
  • The charging port feels loose or damaged
  • You notice sparks when connecting the charger
  • You’re unsure about compatibility

The Bottom Line

Your laptop charger is more than just a power cable—it’s a critical component affecting your device’s safety, battery health, and reliability. Don’t ignore the warning signs, and never compromise on quality when replacing it.

Have charger questions or replacement experiences to share? Drop them in the comments below!

Next week: How to properly dispose of or recycle old electronics safely.


Disclaimer: Always consult your laptop’s manual and manufacturer guidelines for specific charging requirements. When in doubt, choose OEM replacement parts or consult with a qualified technician.

Posted on Leave a comment

How to Replace Your Laptop Battery:

A Step-by-Step Guide (With Video Tutorials)

Is your laptop dying faster than your phone on a busy day? Do you find yourself constantly hunting for power outlets? If so, it might be time for a battery replacement. Don’t worry—you don’t need to be a tech wizard to do this! Swapping out your laptop battery is one of the most common and rewarding DIY repairs.

In this guide, I’ll walk you through the general process, important safety tips, and link to some helpful video tutorials for specific laptop models.

Why Replace Your Laptop Battery?

Over time, laptop batteries lose their ability to hold a charge. If you’re getting only an hour or two of usage when you used to get six, a new battery can feel like a brand-new machine. It’s cost-effective, reduces e-waste, and extends your laptop’s life.

⚠️ SAFETY FIRST: Crucial Precautions

  1. Power Down & Unplug: Turn off your laptop and unplug it from the charger.
  2. Ground Yourself: Touch a metal part of the laptop’s chassis to discharge static electricity, which can damage internal components.
  3. Work in a Clean, Well-Lit Area: Use a non-conductive surface like a wood table.
  4. Use the Right Tools: Usually a small Phillips-head screwdriver is all you need.
  5. Handle the Old Battery Carefully: Don’t puncture, bend, or expose it to extreme heat.

General Step-by-Step Process

Step 1: Identify Your Battery Type & Buy a Replacement

  • Check if it’s User-Replaceable: Many modern laptops have sealed batteries, but many still have removable ones.
  • Find the Correct Part: Look on the bottom of your laptop for a model number (e.g., “Dell XPS 15 9500,” “HP Pavilion 15-cs3000”). Search online for “[Your Laptop Model] battery replacement” to buy an OEM or reputable third-party battery.

Step 2: Access the Battery

  • Removable Battery (Older Models): Look for a latch or release switch on the bottom. Slide it to release the battery.
  • Internal Battery (Most Modern Laptops): You’ll need to remove the bottom panel. Unscrew all the screws (keep them organized!). Some panels may have clips, so use a plastic prying tool to gently lift the edges.

Step 3: Remove the Old Battery

  • Disconnect the Connector: The battery will be connected to the motherboard by a cable. Gently disconnect it by pulling the connector straight up or to the side. Never pull on the wires themselves.
  • Unscrew/Unstick: The battery may be held in place with screws or strong adhesive. Remove screws carefully. If it’s glued, you may need to gently use a plastic card or spudger to pry it loose. Go slow.

Step 4: Install the New Battery

  • Place the New Battery: Position the new battery in the compartment.
  • Reconnect: Plug the battery cable firmly into the motherboard connector.
  • Secure It: Replace any screws or brackets that hold the battery down.

Step 5: Reassemble and Test

  • Replace the Bottom Panel: Carefully snap and/or screw the panel back on.
  • Initial Charge: Plug in your charger (without turning it on) for at least an hour to give the new battery a good initial charge.
  • Power On & Calibrate: Turn on your laptop. For best performance, let it charge to 100%, then use it on battery until it shuts down (or reaches 5-10%). Charge it back to 100% uninterrupted. This helps calibrate the battery meter.

Helpful Video Tutorials

Seeing the process is always better. Here are a few excellent, detailed videos for popular laptop models:

  1. Generic Guide for Many Laptops (Ifixit)
  2. Dell XPS 15 (9500/9510) Specific
  3. HP Pavilion / HP Laptop General
  4. Apple MacBook Pro (A1708 2017-2020)

Pro Tip: Always search YouTube for “[Your Exact Laptop Model] battery replacement” to find the most accurate guide for your machine.


When to Seek Professional Help

  • If your laptop’s battery is soldered to the motherboard.
  • If you encounter a lot of strong adhesive and don’t feel comfortable.
  • If the disassembly process seems too complex (some laptops require removing the keyboard first!).

Replacing your laptop battery is a satisfying project that can save you money and give your trusted device a new lease on life. With the right part, the right tools, and a little patience, you’ve got this!

Have you replaced your laptop battery before? Share your tips or questions in the comments below!

Posted on Leave a comment

Computer Upgrades To Extend Your Laptop’s Lifespan

Is your laptop showing its age? While most users expect 5-8 years of service, the difference between a sluggish machine and one that lasts for years longer often comes down to timely, strategic upgrades.

Before you consider replacing your laptop, know that a handful of targeted upgrades can significantly boost performance and extend its lifespan. For example, if increased workloads are causing overheating, a simple investment in a cooling stand can protect your hardware and prevent throttling.

The right accessories don’t just patch problems—they ensure longevity, enhance performance, and improve comfort as your computing demands grow. Ready to unlock your laptop’s potential? This guide covers essential upgrades and gadgets designed to improve both performance and lifespan.


Top Laptop Accessories to Enhance Performance & Longevity

From connectivity hubs to power management tools, here are the key upgrades that help your laptop go the distance:

1. Upgrade to a High-Quality Replacement Battery

Laptop batteries have a finite lifespan, typically showing wear after 1–2 years or 300–400 charge cycles. Most systems include built-in diagnostics to monitor battery health, but clear signs indicate when a replacement is needed:

  • Rapid power drain despite a full charge
  • Overheating during normal use
  • Charging stops at a certain percentage
  • Laptop only works when plugged in
  • Visible battery swelling (replace immediately)
  • System alerts like “Consider replacing your battery”

A genuine or high-compatibility replacement battery restores portability and protects your laptop from potential power-related damage.

To assess your battery’s health, you can use your laptop’s built-in diagnostic tools to see what percentage of its original capacity remains. This clearly shows how much efficiency has dropped and helps you decide the ideal time for a replacement.

When choosing a replacement battery, focus on two key specifications: capacity and voltage.

  • Capacity (mAh or Wh): This determines how long your laptop can run on a single charge. Opting for a higher capacity can extend runtime, but ensure it is compatible with your laptop’s power management system.
  • Voltage (V): This must exactly match your laptop’s original requirement. An incorrect voltage can lead to system instability, performance loss, or even hardware damage.

For a safe and effective upgrade, select a battery with the same voltage as the original and a capacity that is equal to or slightly higher. We recommend purchasing from suppliers that offer certified, high-quality batteries, such as those with BIS approval, to ensure safety and reliability across various brands and models.


2. Invest in a Reliable Laptop Adapter

Like batteries, laptop adapters wear out over time—often even faster due to daily handling. Frequent plugging and unplugging, cable bending, heat exposure, or accidental tugs can weaken the adapter and affect its performance.

Watch for these warning signs that indicate it’s time to replace your charger:

  • The charger pin feels loose, or you must adjust it to a specific angle to establish a connection.
  • The laptop intermittently switches between charging and not charging while plugged in.
  • The adapter brick or cable becomes unusually hot during use.
  • Charging is significantly slower, or the battery fails to reach 100%.
  • Visible damage such as frayed cables, bent pins, or a burnt odor.

Using a damaged or incompatible adapter risks poor performance, battery issues, or permanent damage to your laptop. Upgrading to a high-quality, manufacturer-certified adapter ensures stable power delivery and protects your investment.

Here is the upgraded and polished version of your text, structured for clarity, impact, and professionalism in an e-commerce context.


3. Add a Laptop Cooling Pad
Heat is one of the biggest enemies of laptop performance and longevity. During intensive tasks, your CPU and GPU generate significant heat that built-in fans often struggle to dissipate—especially if vents are blocked by soft surfaces like beds or couches.

Prolonged overheating can cause serious damage: thermal paste dries out, solder joints weaken, and your laptop may throttle performance to avoid permanent failure. To combat this, a laptop cooling pad is a smart, affordable upgrade. Equipped with multiple external fans, a good cooling pad dramatically improves airflow, reduces internal temperatures, and can even offer an ergonomic lift for more comfortable typing.

Recommended: [Top 5 Cooling Pads for Laptops in India – Reviewed & Ranked [2025]]

4. Upgrade to an SSD (If You’re Still Using an HDD)
If your laptop still relies on a traditional hard disk drive (HDD), upgrading to a solid-state drive (SSD) is one of the most impactful performance boosts you can make. SSDs deliver lightning-fast boot times, quicker file transfers, and lower heat output—all while consuming less power.

With no moving parts, SSDs are also more durable and reliable than HDDs. This upgrade doesn’t just speed up your system; it can breathe new life into older laptops, making them feel brand new.

5. External Keyboard & Mouse
Heavy daily use can wear down your laptop’s built-in keyboard and trackpad. More importantly, typing directly on a laptop often leads to poor posture, causing strain on your neck, wrists, and shoulders.

An external keyboard and mouse allow you to create an ergonomic workspace: raise your laptop screen to eye level, keep your wrists neutral, and type in comfort. This simple addition not only protects your laptop’s built-in components but also boosts productivity and comfort during long sessions.

6. Docking Station or USB Hub
Modern laptops often come with limited ports, forcing you to constantly plug and unplug peripherals like external drives, monitors, printers, and more. This is not only inconvenient—it also wears out your laptop’s ports over time.

A USB hub or docking station solves this elegantly. With a single connection to your laptop, you gain access to multiple ports, simplifying your setup and reducing physical stress on your device. It’s the ultimate connectivity upgrade for professionals and power users.

7. Surge Protector or UPS
Power fluctuations and sudden outages pose a real risk to your laptop, potentially damaging the motherboard, corrupting data, or shortening battery life. If you live in an area with unstable electricity, protection is essential.

A surge protector shields your device from voltage spikes, while an Uninterruptible Power Supply (UPS) provides backup power during outages—giving you time to save work and shut down safely. These are must-have accessories for safeguarding your hardware and data.

8. Laptop Protection & Maintenance Essentials
Physical and digital care are key to extending your laptop’s life.

  • Protection on the Go: A padded, water-resistant laptop sleeve or bag protects against bumps, drops, dust, and weather when traveling.
  • Internal Maintenance: Regular software upkeep is just as important. Below are types of tools that can help keep your system clean, secure, and optimized:
Software TypeExample 1Example 2Example 3Example 4
Disk Cleanup UtilitiesCCleanerDisk Cleanup (Windows)DaisyDisk (Mac)BleachBit
Antivirus SoftwareNortonMcAfeeBitdefenderKaspersky
System MonitoringMSI AfterburnerHWMonitorCore TempTask Manager

Note: The software names above are listed as examples only for informational purposes. We do not endorse any specific product. Always conduct your own research to choose tools that fit your needs.


Conclusion

Over time, every laptop needs support to maintain peak performance. Instead of replacing your device, strategic upgrades can extend its life and enhance your experience.

While it may be tempting to choose the cheapest accessories available, uncertified products often lead to compatibility issues, faster battery drain, or even hardware damage—usually without reliable warranty support.

At Techie Store, we offer certified, high-quality laptop accessories backed by manufacturer warranties and customer-friendly return policies. Whether you need a cooling pad, SSD, adapter, or any performance-boosting upgrade, you’ll find the right fit for your laptop here.

Explore our curated collection today and give your laptop the upgrade it deserves.